

If you’re just starting to work withPower Query, it’s very important to understand how dates and times are handled.
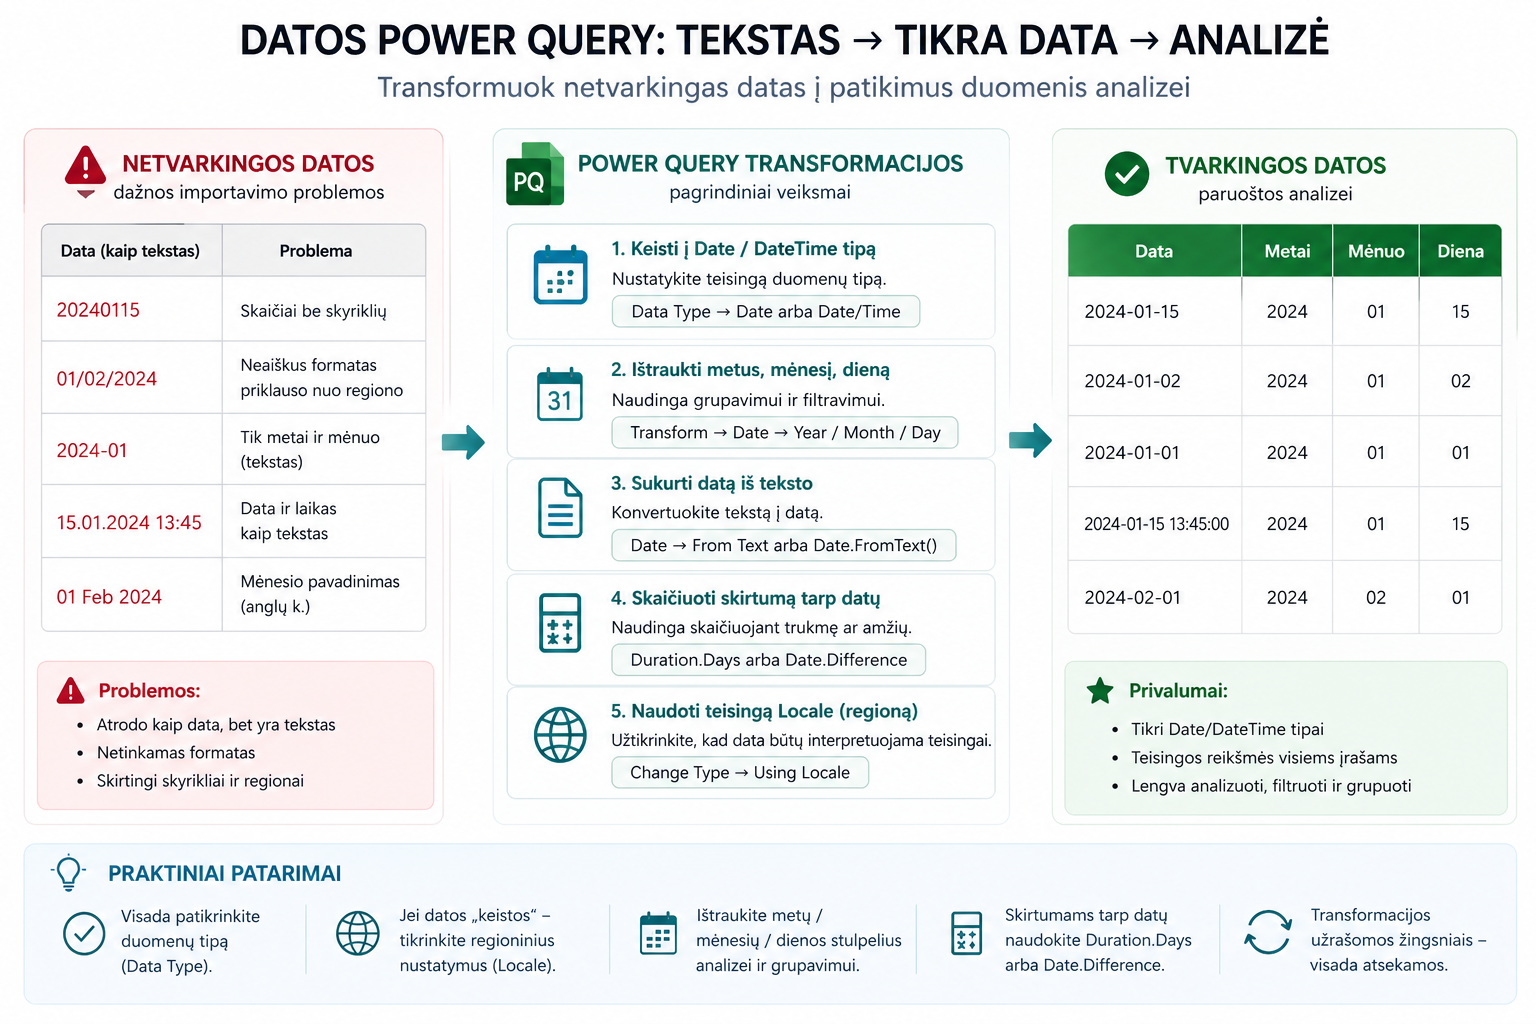
1. Change to the Date or DateTime type
If Power Query doesn’t recognize a date, the first step is to set the correct data type.
Select the column → Data Type → Date or Date/Time
2. Extract the year, month, day
Useful when you need to group or analyze data by period.
- Year
- Month
- Day number
This method is often used together withGroup By in Power Query.
Transform → Date → Year / Month / Day
3. Create a date from text
If the date is text (e.g. 20240115 or 01/02/2024), it needs to be converted.
Transform → Date → From Text
or
Custom Column → Date.FromText()
If you need more flexibility, useCustom Column.
4. Calculate the difference between dates
Examples:
- Days between the order and delivery
- The customer’s age
Custom Column → Duration.Days or Date.Difference
5. The locale problem (regional settings)
For example, “01/02/2024” can mean different dates depending on the region – in the US format it’s January 2, while in Europe it’s February 1.
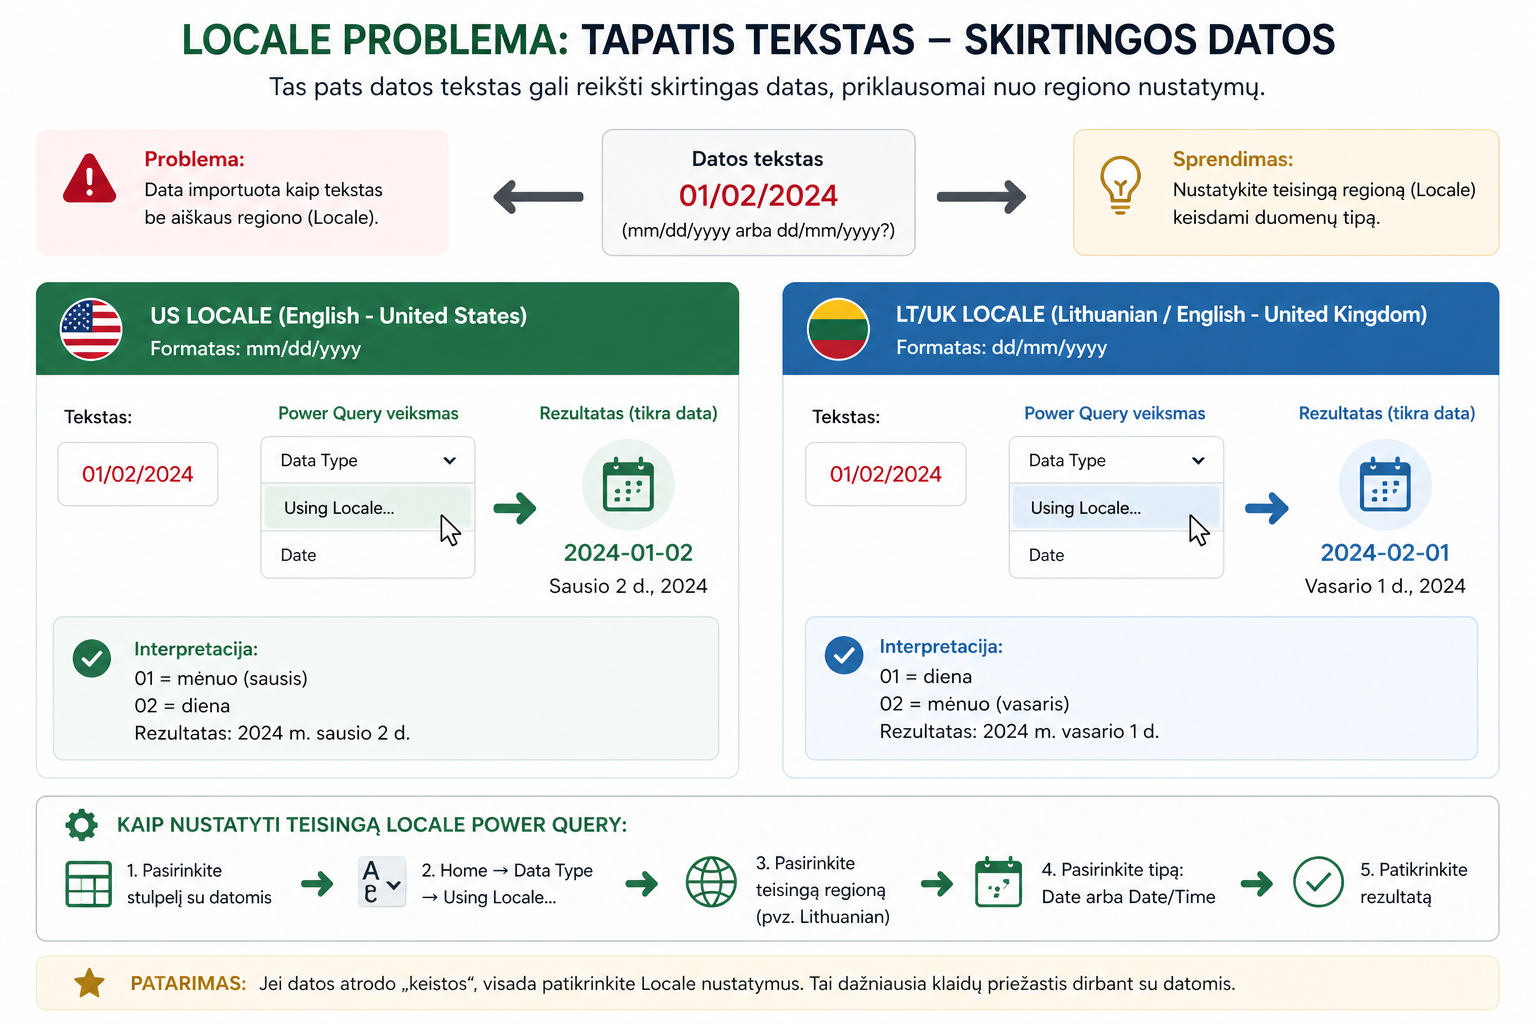
Such errors occur because different regions use different date formats (MM/DD/YYYY vs DD/MM/YYYY).
Change Type → Using Locale → select the correct region
Such problems often arise together with:incorrect data types.
First set the correct type.
Use Date transformations.
If the dates look “strange” – check the Locale.
What to read next
Conclusion
Dates in Power Query often cause problems, but once you understand data types and locale settings, they can be solved quickly.
Tidy dates are essential for correct analysis in Power BI.
Power Query cheat sheet: automate your report
The key steps, the 5 common mistakes, and when automating is worth it.
- PDF · 2 pages, practical
- No spam — value only